This post is the fourth part of the series about Kubernetes for beginners. In the
third part, I wrote about services(SVC) and horizontal
pod autoscaler(HPA). This post will introduce you to the Kubernetes tool: kubectl.
Also, all examples were shallow so far; to get you started with Kubernetes, you need
to get a feeling of the K8s and their components. In this episode, I explain the
connections between Deployments and Pods, too.
Let’s start…
Local Environment Setup
Before I start, we need some kind of Kubernetes cluster. There are several options:
- Minikube
- Kind
- Docker Desktop
- MicroK8s
- Rancher Desktop
- K3s
In my examples, I’ll use Rancher Desktop. Why? Because it is easy to install and use. Also, it has a nice UI that makes it easy to manage your Kubernetes cluster. So, without further delay, let’s install Rancher Desktop.
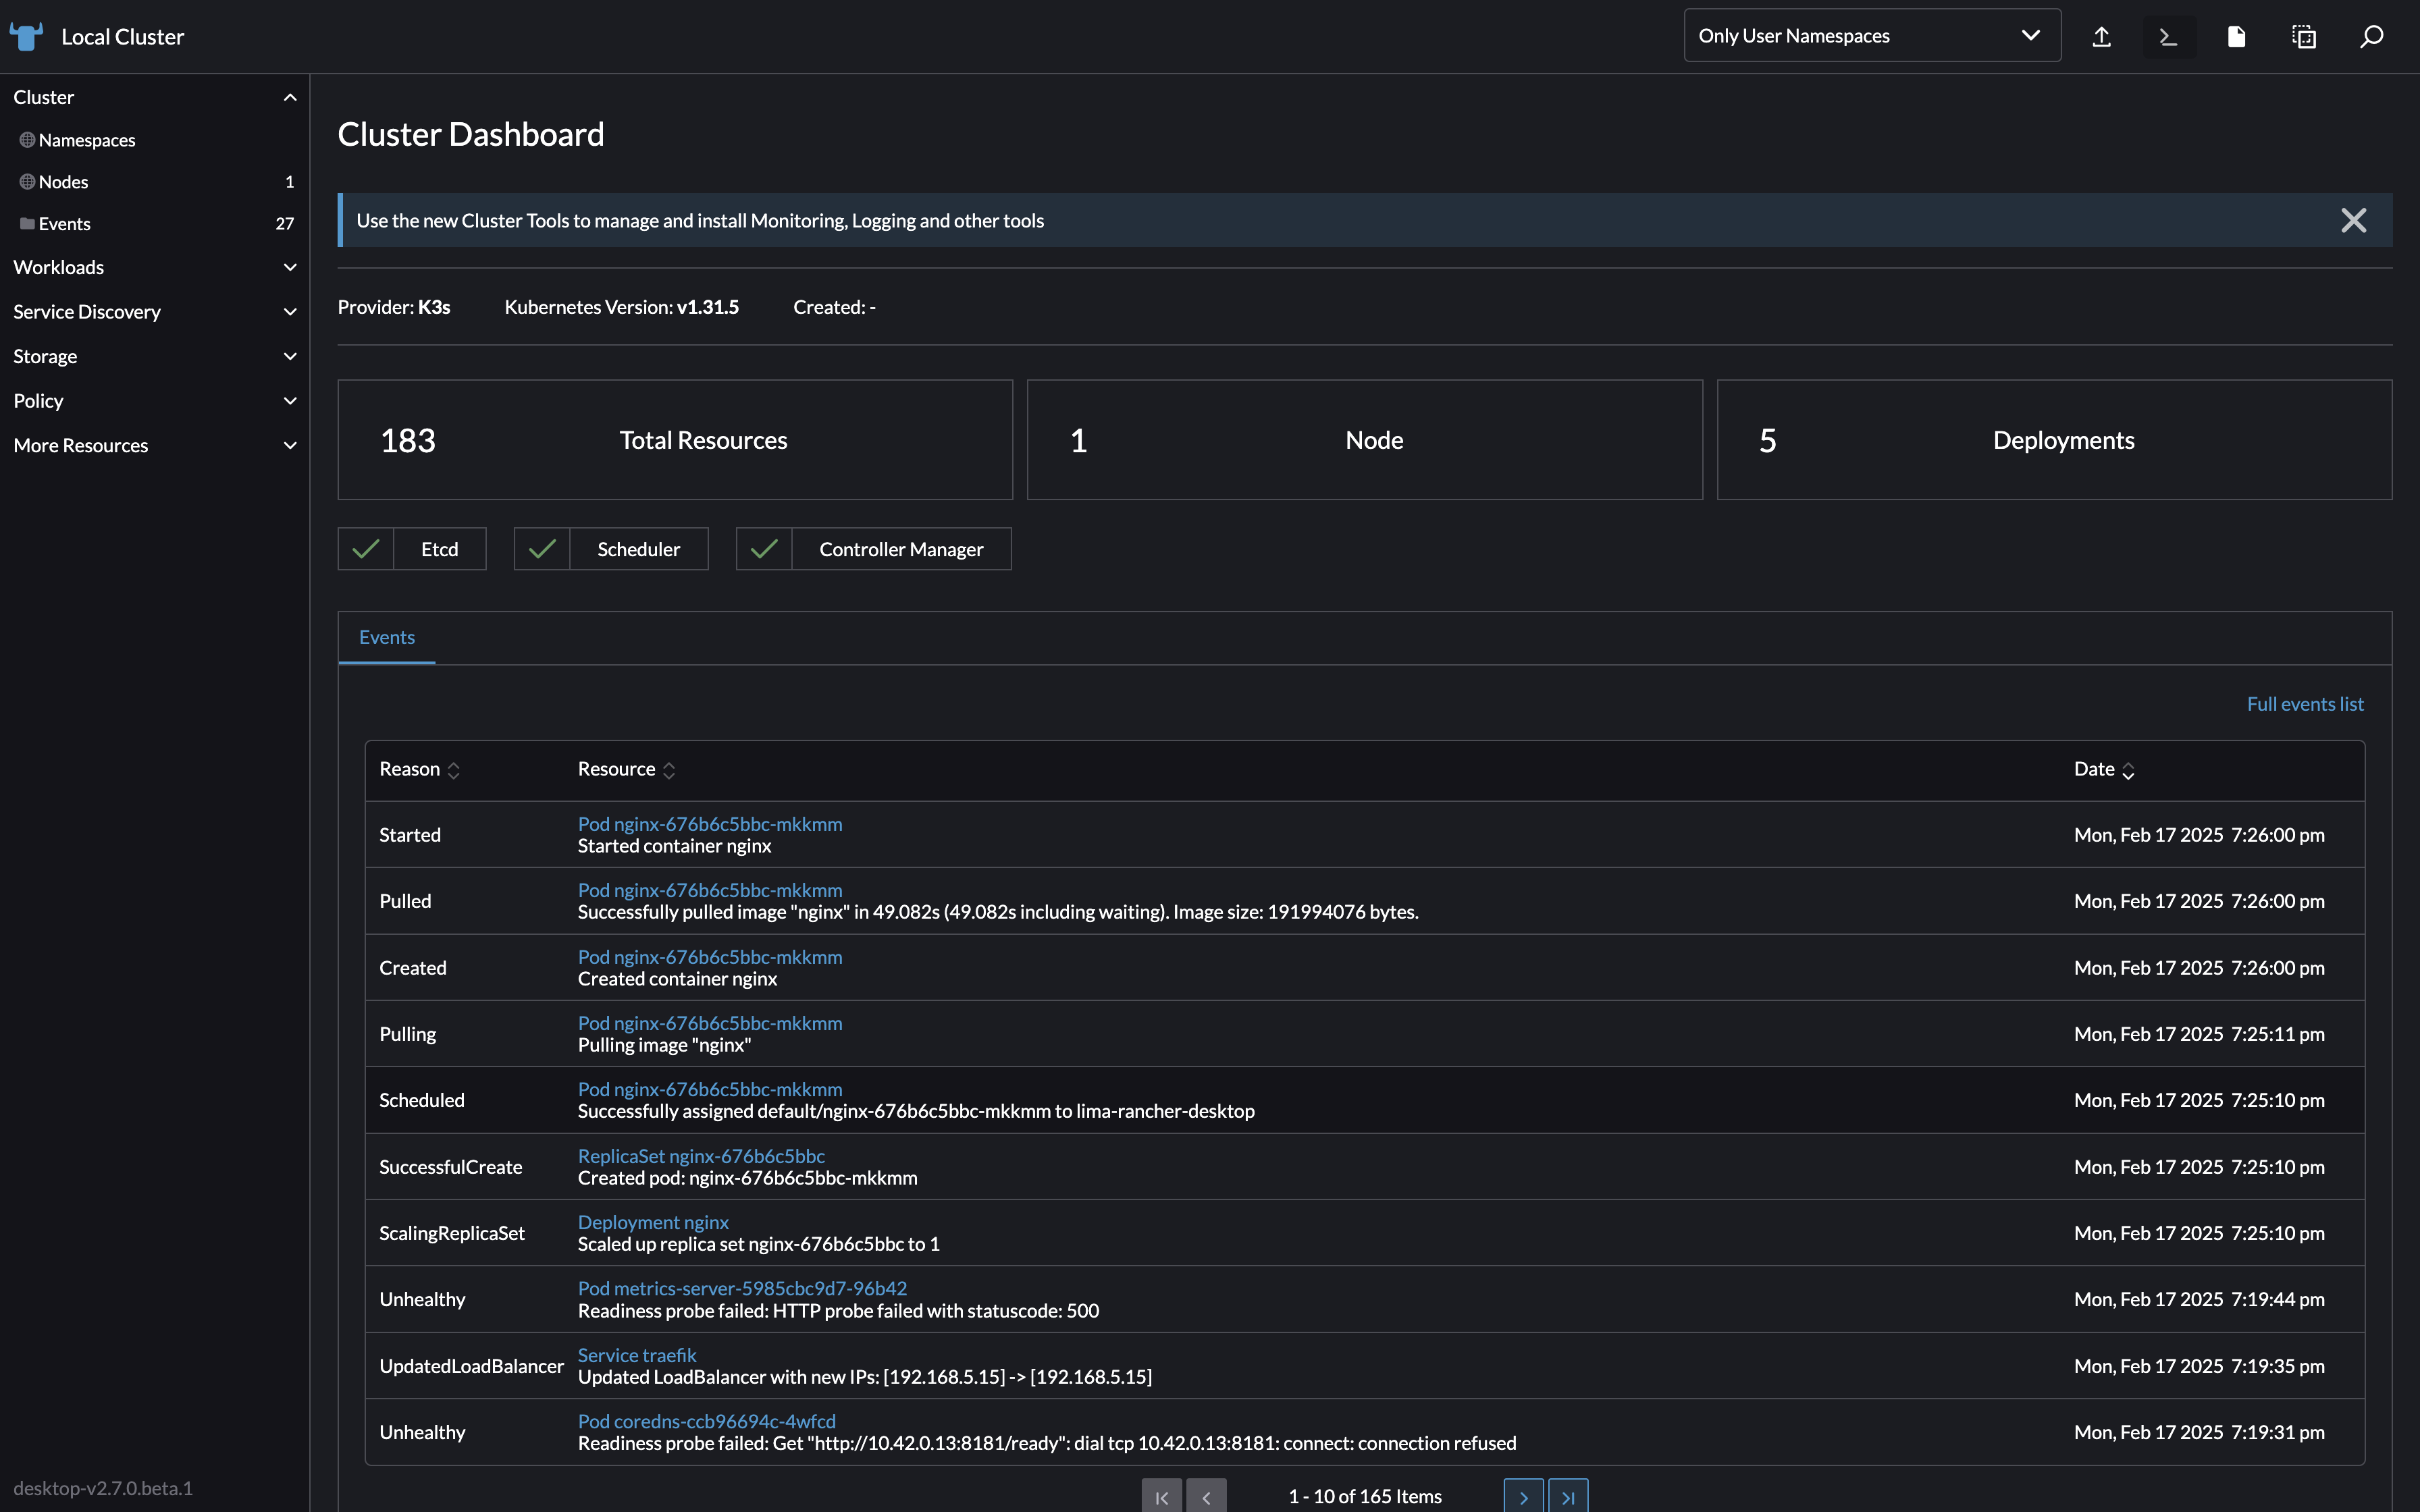
Once you install Rancher Desktop, start it. From the main dashboard, you can see the
status of your cluster. Open a cluster dashboard to see a list of Kubernetes
components and their status.
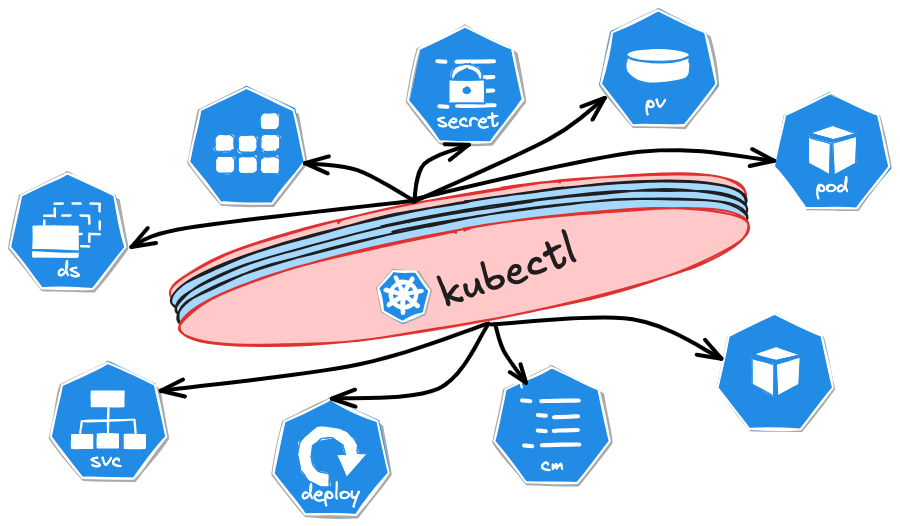
Kubectl
Kubectl is a command-line tool that allows you to interact with your Kubernetes cluster.
Kubectl version
If you go to your local terminal, you can start using kubectl. For a start, try
getting kubectl version:
❯ kubectl version
Client Version: v1.32.1
Kustomize Version: v5.5.0
Server Version: v1.31.5+k3s1
These tell us the kubectl, kustomize, and K8s server versions. It is good practice to keep the client(kubectl) and server(K8s) versions in sync, or at least +/- 1 minor version.
Kustomize is a templating tool that allows you to customize Kubernetes resources. More about it later.
Kubectl completion
You first need to make your life easier by enabling kubectl completion and adding
an alias for kubectl. For example, if you are using zsh, you can add the following
to your ~/.zshrc file:
source <(kubectl completion zsh)
alias k=kubectl
complete -F __start_kubectl k
To permanently enable kubectl completion, do the following:
echo '[[ $commands[kubectl] ]] && source <(kubectl completion zsh)' >> ~/.zshrc # add autocomplete permanently to your zsh shell
My preference is to use zsh, Oh My Zsh, and to use Oh My Zsh
plugin kubectl.
Kubectl config
The kubectl will allow you to interact with your K8s clusters. Yes, you can use it to
access multiple clusters. To access a particular cluster, you will tell kubectl
which cluster to use by choosing its context. Try it:
❯ kubectl config get-contexts
CURRENT   NAME              CLUSTER           AUTHINFO          NAMESPACE
          colima            colima            colima
          docker-desktop    docker-desktop    docker-desktop
*         rancher-desktop   rancher-desktop   rancher-desktop
With kubectl config, you can manage your access to multiple clusters. Above, I’m
asking kubectl to list all contexts. The one with a star is the current context.
That means that kubectl will use this context by default. Otherwise, you can specify
the context you want to use with kubectl by using the --context flag, for example:
❯ kubectl --context colima get pods
That way, you can switch between clusters without changing your default context.
Tip
When managing active contexts, I suggest you check out the tool kubectx.
I prefer to type the --context flag every time. With auto-completion, it’s
not overhead, and I’m always aware of the active context. Also, if you are using
the Oh My Zsh plugin kubectl, you can set your prompt to show your default context.
Let’s see what other config options are available with:
❯ kubectl config
Of all the options, the most important would be:
- to set current context
kubectl config use-context <context-name> - to view current context
kubectl config current-context - to delete context
kubectl config delete-context <context-name> - to rename context
kubectl config rename-context <old-context-name> <new-context-name>
Creating Resources
If you want to create a resource quickly, you can use the kubectl create command.
For example, to create a deployment, you can use the following command:
❯ kubectl create deployment nginx --image=nginx
The command above will create a ’nginx’ deployment with an image nginx. The other
way would be to create a deployment from a YAML file. Let’s quickly see what that
yaml file looks like:
apiVersion: apps/v1
kind: Deployment
metadata:
  labels:
    app: nginx
  name: nginx
spec:
  replicas: 1
  selector:
    matchLabels:
      app: nginx
  template:
    metadata:
      labels:
        app: nginx
    spec:
      containers:
      - image: nginx
        name: nginx
The yaml above would be minimal to create a Deployment called nginx with the image nginx.
Important things to note:
- Every K8s resource definition must have tags:
apiVersion,kind,metadata, andspec. - Resources must have a unique name within the namespace(
metadata.name).
Let’s look at a Pod definition:
apiVersion: v1
kind: Pod
metadata:
  labels:
    run: nginx
  name: nginx
spec:
  containers:
  - image: nginx
    name: nginx
Notice a similar structure to the Deployment definition. Under the Deployment tag,
spec.template is the Pod definition. In addition to the Pod definition, Deployment
has spec.replicas and spec.selector tags. Tags spec.replicas defines the number
of Pods to run under the Deployment. The spec.selector tag defines the label selector
for the Pods to be managed by the Deployment.
Read it like all Pods that match the label selector belong to the Deployment.
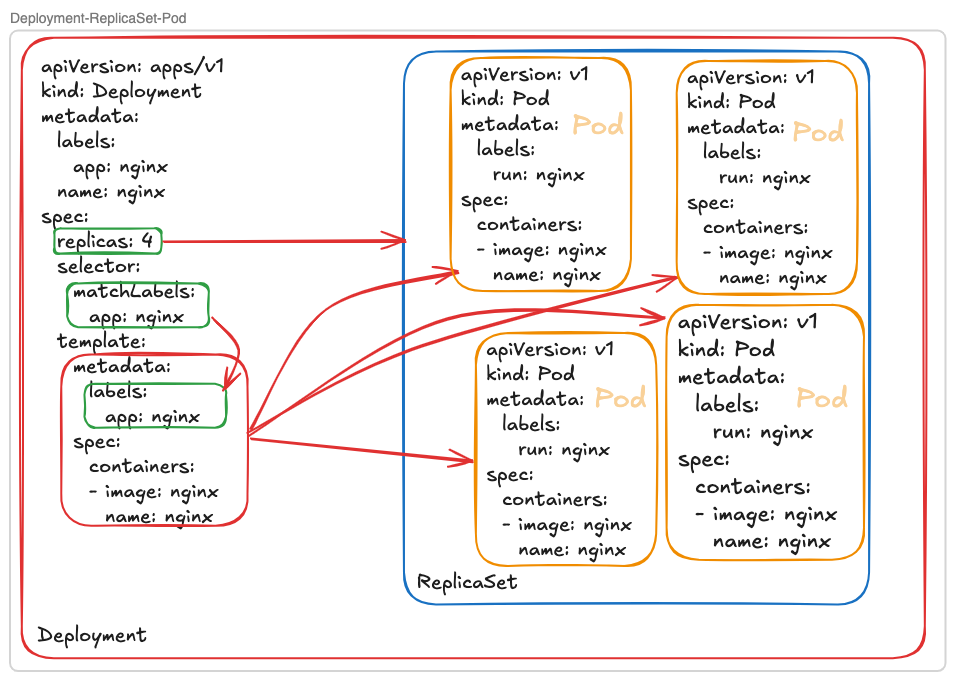
Notice that the name for the Pod in the Deployment is not set, while the name for the Pod in the Pod definition is set. The K8s generate the name for the Pod in the Deployment.
Let’s create the above Deployment and the Pod. Save the above definitions in files nginx-deployment.yaml
and nginx-pod.yaml. Then apply them using:
❯ kubectl apply -f nginx-deployment.yaml
deployment.apps/nginx created
❯ kubectl apply -f nginx-pod.yaml
pod/nginx created
Listing/Searching for Resources
Now, if you would like to list all Deployments, run the following:
❯ kubectl get deployments
NAME    READY   UP-TO-DATE   AVAILABLE   AGE
nginx   1/1     1            1           2m50s
The output shows that the Deployment has one Pod running and is up-to-date. Check Pods:
❯ kubectl get pods
NAME                     READY   STATUS    RESTARTS   AGE
nginx                    1/1     Running   0          3m45s
nginx-676b6c5bbc-dgvg2   1/1     Running   0          4m7s
The first Pod, nginx, is created by the Pod definition, while the second Pod,
nginx-676b6c5bbc-dgvg2, is created by the Deployment nginx. The number of Pods
created by the Deployment is determined by the replicas field in the Deployment
definition. The ReplicaSet controls it:
❯ kubectl get replicasets
NAME               DESIRED   CURRENT   READY   AGE
nginx-676b6c5bbc   1         1         1       6m16s
Notice that ReplicaSet name is derived from Deployment’s name and suffix, in this
case nginx-676b6c5bbc. From ReplicaSet’s name, the Pod name was created: nginx-676b6c5bbc-dgvg2.
If you modify the Deployment’s replicas field, to 4, for example, and apply the changes:
❯ kubectl apply -f deployment.yaml
deployment.apps/nginx configured
Then check Pods:
❯ kubectl get pods
NAME                     READY   STATUS    RESTARTS   AGE
nginx                    1/1     Running   0          11m
nginx-676b6c5bbc-dgvg2   1/1     Running   0          11m
nginx-676b6c5bbc-hw66m   1/1     Running   0          36s
nginx-676b6c5bbc-lsrl6   1/1     Running   0          36s
nginx-676b6c5bbc-qxbd4   1/1     Running   0          36s
Another way to modify the Deployment’s replicas field is to use the scale command:
❯ kubectl scale deployment nginx --replicas=2
deployment.apps/nginx scaled
❯ kubectl get pods
NAME                     READY   STATUS    RESTARTS   AGE
nginx                    1/1     Running   0          12m
nginx-676b6c5bbc-dgvg2   1/1     Running   0          12m
nginx-676b6c5bbc-lsrl6   1/1     Running   0          109s
As you can see, the Deployment has been scaled down to 2 replicas.
You get more information about resources with the kubectl get command. For example:
❯ kubectl get deployment nginx -o wide
NAME      READY   UP-TO-DATE   AVAILABLE   AGE   CONTAINERS   IMAGES         SELECTOR
nginx     2/2     2            2           12m   nginx        nginx:latest   app=nginx

❯ kubectl get pods -o wide
NAME                     READY   STATUS    RESTARTS   AGE     IP           NODE                   NOMINATED NODE   READINESS GATES
nginx                    1/1     Running   0          16m     10.42.0.37   lima-rancher-desktop   <none>           <none>
nginx-676b6c5bbc-dgvg2   1/1     Running   0          16m     10.42.0.36   lima-rancher-desktop   <none>           <none>
nginx-676b6c5bbc-lsrl6   1/1     Running   0          5m53s   10.42.0.38   lima-rancher-desktop   <none>           <none>
From Deployment, I see what the selector is, and I can get only Pods for that selector:
❯ kubectl get pods --selector app=nginx -o wide
NAME                     READY   STATUS    RESTARTS   AGE     IP           NODE                   NOMINATED NODE   READINESS GATES
nginx-676b6c5bbc-dgvg2   1/1     Running   0          19m     10.42.0.36   lima-rancher-desktop   <none>           <none>
nginx-676b6c5bbc-lsrl6   1/1     Running   0          8m44s   10.42.0.38   lima-rancher-desktop   <none>           <none>
Tip
Most of the kubectl options have short switches. For example, --selector=app=nginx
can be shortened to -l app=nginx. A label that you set can be used to identify,
filter, and group resources.
Let’s try getting all resources that have the label app=nginx:
❯ kubectl get all -l app=nginx
NAME                         READY   STATUS    RESTARTS       AGE
pod/nginx-676b6c5bbc-dgvg2   1/1     Running   2 (144m ago)   23h
pod/nginx-676b6c5bbc-lsrl6   1/1     Running   2 (144m ago)   23h

NAME            TYPE        CLUSTER-IP    EXTERNAL-IP   PORT(S)   AGE
service/nginx   ClusterIP   10.43.241.2   <none>        80/TCP    3d2h

NAME                    READY   UP-TO-DATE   AVAILABLE   AGE
deployment.apps/nginx   2/2     2            2           23h

NAME                               DESIRED   CURRENT   READY   AGE
replicaset.apps/nginx-676b6c5bbc   2         2         2       23h
Using kubectl get all will fetch all resources in one namespace. The above command
will fetch all resources with the label app=nginx. That means the label app=nginx is used
to group resources. You can use any label to group resources.
I can get the manifest for the Deployment or Pod:
❯ kubectl get deployment nginx -o yaml
...
Info
Notice that the yaml is not the same as the one we created. Kubernetes will add some fields to the yaml file. These fields are not in the yaml file we created, but Kubernetes requires them to manage the resource.
The option -o or --output is used to specify the output format. The default
output format is table. Many other output formats are available, but the most useful
for daily work are table(default), yaml, wide, and json when sending output
downstream to another system. Also, jsonpath is useful for extracting specific
information from the output.
To be continued…